Monday, November 4, 2013

Owl Ballerina Birthday Invitations

Well, Caitlyn's third birthday has come and gone - but was a successful ballerina theme!!  My lovely friend who had the brilliant idea for the Tinkerbell invitations created these beyond adorable Owl Ballerina invitations for Caitlyn's party. There's nothing I love doing more for birthday parties than having a personal handmade way to celebrate the day!


The back of the invitation said "Come Dance and Twirl with the Birthday Girl" and then of course had space to enter the party details. 
It was a bit of a challenge to get the invitations in an envelope for mailing though!  I ended up folding her little arms in so she fit in the envelope.   Thanks to Jessica for making these for my little ballerina! 


Happy Crafting! 


Saturday, October 26, 2013

Spooky Halloween Tulle Wreath

Halloween is one of my favorite times of the year! I've been so busy the past few weeks with getting ready for the craft show; I almost forgot to make my Halloween wreath.

I think because I waited so long to make my wreath, my selection of decor to add to it was limited. However, I was able to find some black roses and spider ribbon; and it turned out pretty cute! I was able to get the Halloween ribbon and black roses on clearance - so overall this wreath only cost about $8 to make!  Not too shabby!!

 Materials Needed:
- 1 Spool of Black Tulle
- 3 Black Silk Roses
- 1 Spool of Halloween Spider Ribbon
- Purple Silk Flowers
 - Purple Silk Flowers and Embelishments
- Hot Glue Gun


Maybe next year I'll spruce this wreath up a bit with some cob webs!  
Happy Halloween and Happy Crafting! 

Wednesday, September 25, 2013

Autumn Tulle Wreath

Time for another wreath!  This time I made an autumn wreath for a friend at work.  I love how it turned out, so I will definitely be making one for myself as well.

My favorite part of autumn is the colors; I wish we could have colors like this all the time. For this wreath I decided to stick with chocolate brown, orange and off-white/cream white tulle.  I wanted to compliment all the beautiful autumn colors in the ribbon and the embellishments.

Materials Needed:
- Styrofoam circle wreath
-  Spool of brown tulle
- Spool of off-white/cream tulle
- Spool of orange tulle
- Wired pumpkin ribbon
- Autumn leaves floral pics
- Hot Glue gun


Overall, I'm pleased with this one!  I might change things up a bit when I make my own - I'm thinking of leaving the orange tulle out and sticking to just brown and cream.  In any case, my friend loved it (and her husband was thrilled she could take down the Easter wreath, lol!). 
 
Happy Autumn and Happy Crafting!


Wednesday, September 11, 2013

Emboridered Birthday Tablecloth

Some 7 years ago, a friend of mine asked if I could embroider a tablecloth for her son's first birthday.  She had the beyond brilliant idea of putting his hand prints on the tablecloth every year!  I thought this was such a cool idea, I knew I had to do one of my own when I had kids.

So, fast-forward now 7 years - I made a tablecloth for Madailein's first birthday and have attempted to put her hand prints on it each year.  With Miss Madailein it was a struggle because she detested the feel of paint on her hands!  I could  not get hand prints the first year, the second year ended up being only one hand; the third year started to get much better!  But, I have this awesome keepsake of each birthday. 

This was one of the first things I embroidered, and boy can you tell! 
In the middle of the tablecloth, I embroidered "Happy Birthday Madailein" and then her birth date, surrounded by some cute birthday designs.  In each of the bottom corners of the tablecloth, I embroidered balloons and cupcakes. 

(Please ignore the wrinkles!  It's been folded for a few months!)


I usually have the tablecloth on the gift table and it looks so adorable with all the hand prints at the bottom!


With Caitlyn, I totally forgot to make a tablecloth for her first birthday - so I decided to do something different for hers.  Stay tuned for that in October!
 
Happy Crafting! 


Wednesday, August 28, 2013

Back to School Tulle Wreath

We are one week in to the new school year!  I can't believe my Madailein is in the first grade - I remember being in first grade myself and it doesn't seem so long ago!!!

To kick off fall and school starting, I decided to make a Back to School tulle wreath to grace our front door.  If you've missed my other tulle wreaths of the  year, check out the Valentine Tulle Wreath and the Easter Tulle Wreath.  These are so easy to make and I have so many ideas for the autumn and winter; I can't wait to make more!

Materials Needed:
- Styrofoam circle wreath
- Spool of red tulle
- Spool of yellow tulle
- Spool of blue tulle
- Back to school themed ribbon - I choose one that looks like a ruler!
- Pencils and crayons for embellisment
- Wooden apple - I found mine at Pat Catan's in the wood decorating department
- Hot glue gun


The tulle was cut into strips approximately 7" long; then tied around the weath.  Once all the tulle was tied on, I gave it a trim so the pieces were even all the way around. 


Add your ribbon, hot glue the pencils, crayons and apple - and Voila! Another adorable tulle wreath for around $10!!
My plan is to leave this wreath up until around the middle of September, then make a fall tulle wreath - so stay tuned for that one!
 
Happy Crafting!


Tuesday, July 30, 2013

Tinker Bell Party Must-Haves!

Planning a Tinker Bell birthday party for my daughter's 6th birthday was so fun!  There are so many activities, games and décor to compliment this theme, you can't go wrong!!  I'm going to share with you how we made this Tinker Bell party a hit.  :)

Party Games
- Moonstone Treasure Hunt
If you've seen Tinker Bell and the Lost Treasure, you know all about moonstones!  I tied some blue floral glass rocks (the kind you use in vases) into some tulle and hid them in the  yard.  The girls had a blast searching for their moonstones!

- Tinker Bell Treasure Box
Now that we found our moonstones, we needed a treasure box to place them in. At Pat Catan's I found paper mache boxes with lids.  Each girl got to select a box and paint it; of course we also had glitter paint to make it sparkle like Pixie Dust!


- Fawn Egg Race
If you know Pixie Hollow, you know that Fawn is an animal fairy!  The girls had to race with eggs and bring them back safe to Fawn without breaking them!  We did have a few casualties - good thing we played this one outside.


Party Food
- Fairy Berries
A lovely mixture of raspberries, blackberries and blueberries in a baking cup - the perfect size of kids!
- Cheese's Cheese
Mixture of cubed cheese (who doesn't love cheese?!)
- Fairy Mary Muffins
Miniature blueberry muffins - again the perfect size for kids.
- Fairy Wands
Pretzel rods with marshmallows rolled in sprinkles.  I thought these would be a big hit with the kids, but they either ate the marshmallows off the pretzel, or just ate the pretzel and left the marshmallow!
- Neverberry Punch
Delicious punch made with lemonade and a splash of cranberry juice.  I also sliced up some strawberries to place in the punch for decoration. 


Party Décor
- Fairie's Welcome sign
Of course you cant' have a fairy party without letting them know they are welcome in a human house (I forgot to take a picture of mine)!  Madailein also made a special sign for the fairies!

- Tea Pots and Pixie Dust
Since Tinker Bell lives in a tea pot, I couldn't resist doing some arrangements in them!  The Pixie Dust not only served as a décor, but a party favor as well.  Each girl got to bring home two jars of Pixie Dust. 


Butterflies and Flowers
- I used as many flowers and butterflies that I could find to make my house more Pixie Hollow-like!


Happy Birthday, Madailein!
Happy Crafting! 

Thursday, July 18, 2013

Tinkerbell Party Invitations

I'm back!!!  The past few months have just been a blur of school ending, work schedule changes, and vacations!  But - now I'm back with lots of crafting to do. 

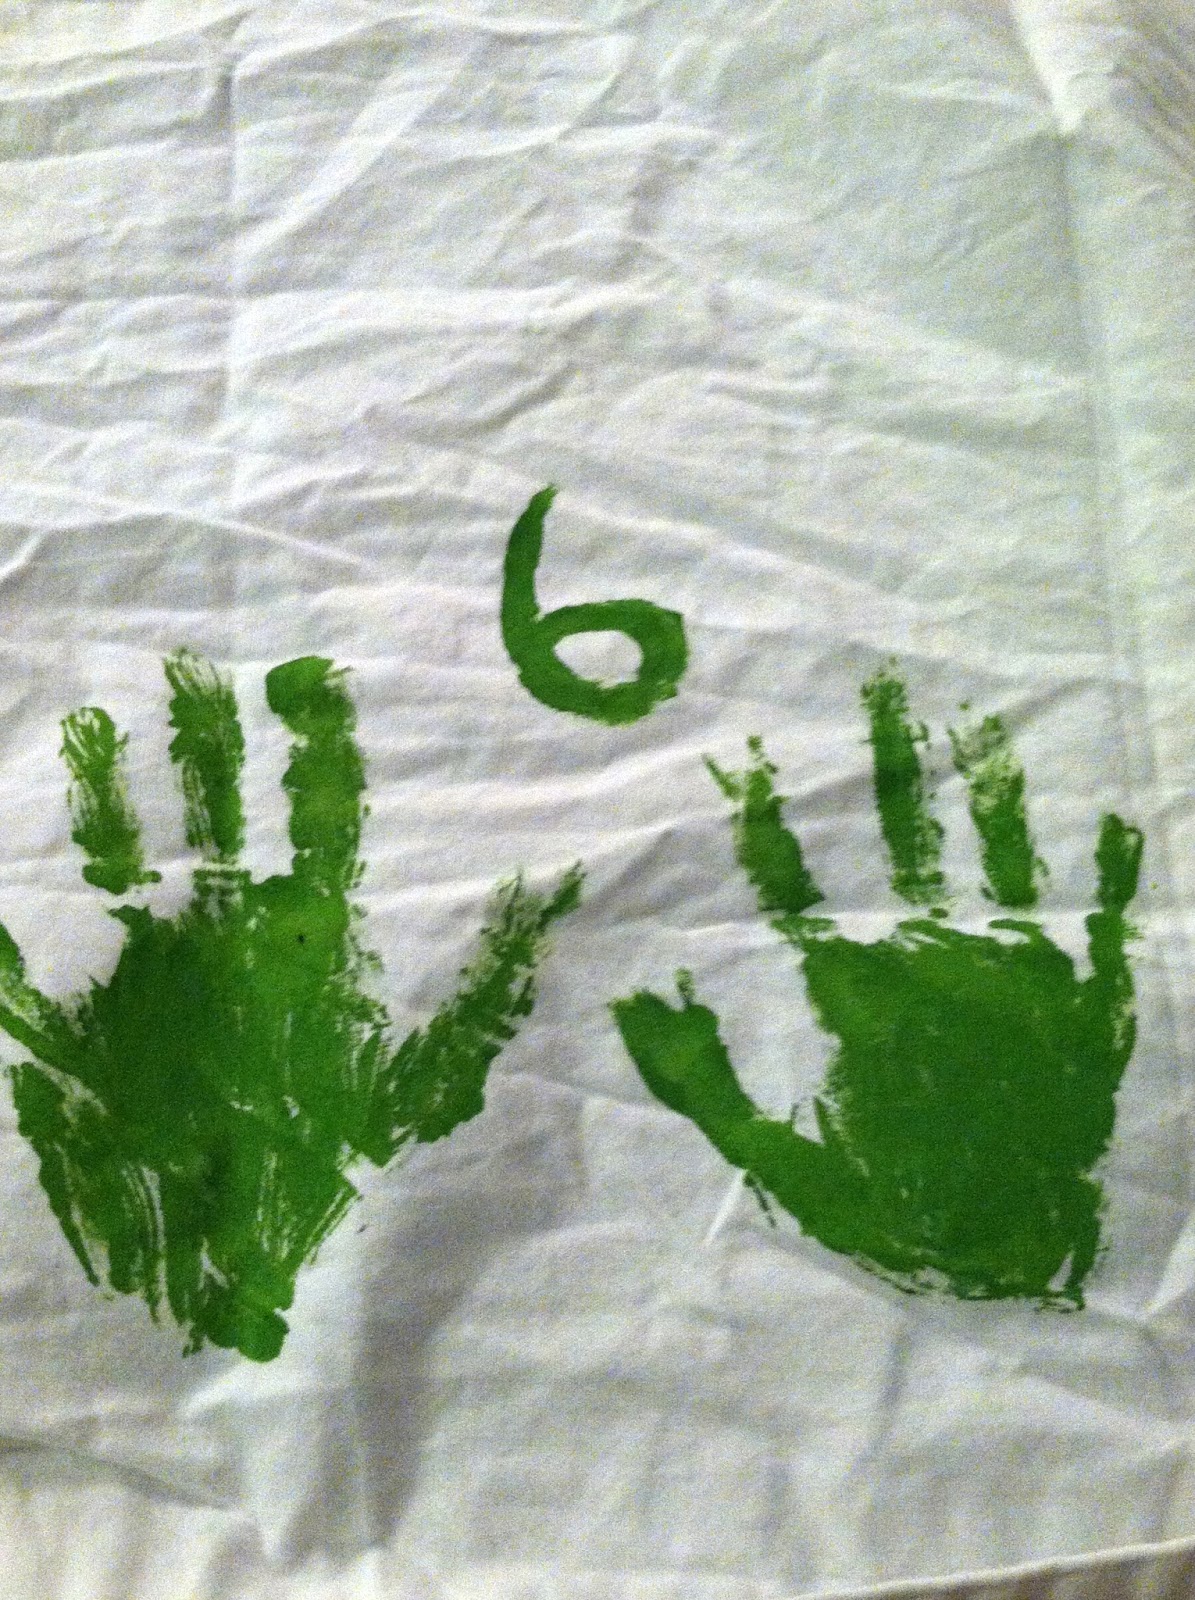
For Madailein's sixth birthday, she decided to have a Tinkerbell party!  There is nothing about Disney that this kid doesn't love.  I typically do not buy the invitations that match the party decor (see last years post with the adorable home-made mermaid invitations) - so I put my creative cap on for some home-made Tink inspired invitations.  My initial idea was to draw a dandelion blowing in the wind - as a metaphor for Tinkerbell (since fairies come from dandelion fluff!).  Thankfully, a dear friend of mine who is fabulous at creating cards and invitations, gave me the best idea. 


Materials Needed:
- Glitter Card Stock - I used pink, green and lavender
- Sheets of Vellum
- Scissors
- Hole Punch
- Ribbon
- Glue Stick
- Self Adhesive Jewel Stickers
- Printer!

Step One-
I found an adorable saying for the invitations while searching the internet:

Sprinkle Some Pixie Dust and Fly Our Way
Come Celebrate Madailein's 6th Birthday!

I also downloaded a Disney inspired font onto my computer to utilize for these cards. On Microsoft Word, I pasted a sillohoute of Tinkerbell and then overlapped the wording ontop the image. 
Words of advice - it is difficult to print onto vellum!!!  I had to watch a YouTube video to figure it out.  Basically, if you tape the vellum to a sheet of computer paper, you can trick the printer into recognizing the vellum.  Be patient and print one sheet at a time. 


Step Two-
Cut the cardstock into the shape of the card (I did rectangles).
Cut the vellum into the same shape, just slightly smaller. 
Glue the vellum onto the cardstock.


Step Three -
Using the hole punch, make two holes in the top of the card.
Thread some ribbon through the holes and make a pretty bow!  Add jewel stickers for some extra sparkle!

Voila!  Super cute, home-made Tinkerbell inspired fairy invitaitons for a fraction of the cost of store-bought invitations.  I bought all the materials at JoAnn Fabrics, used coupons and the total was less than $8.00. 


Happy Crafting!

Monday, April 22, 2013

Super Cute Superman Baby Blanket

I don't know about you, but the past few weeks since Easter have just flown by!  I don't know where the time has gone; and I've gotten very little crafting done.  One thing I have been consistent with in the crafting world is baby blankets.  Many people at work are expecting little ones and I've been lucky to sell a few on my Etsy shop (yea!)

The most recent blanket I made for a co-worker is this absolutely adorable Superman blanket.  Both he and his wife are huge comic book fans, and Superman is their favorite.  I think my favorite part of this blanket is that it almost looks like a superhero cape with the red fabric and turquoise binding!  I hope their baby enjoys this blanket as much as the parent's and I do!!

I apologize for the poor picture quality.  This was the only picture of the front I took before giving it to the parent's-to-be.  Two corners have the Superman logo and the other two corners have Superman in different poses.  The red fabric is a really soft bubble chenile and the binding is a turquoise satin blanket binding.

The fabric on the back is a Superman rocket print on snuggle flannel that I found at JoAnn's.  I just love it!!

Happy Crafting!

Saturday, March 30, 2013

Who is the Easter Bunny?

With tomorrow being Easter, I figured it would be a good time to repost this Easter Bunny post from 2 years ago!  Happy Easter everyone!


Just who is the Easter Bunny?

This is a question I found myself asking as my girls had their picture taken with the Easter Bunny at the mall.  Growing up Catholic, I of course know the religious meaning of the holiday - but where did the Easter Bunny originate?

Eastre was originally a Pagan festival to celebrate springtime.  Eastre was a goddess worshipped by Anglo-Saxons through her earthly symbol - the rabbit. In Pre-Christian lore, the hare and rabbit were among the most fertile animals and therefore became symbols of new life during the spring.

The idea of the Easter Bunny was introduced to America by German settlers in the Pennsylvania Dutch area in the 1700's.  This bunny was known as the "Oschter Haws" and was believed to lay colorful eggs.  Children would make nests for the Oschter Haws to use to hold the eggs.  In the 1800's the Germans created the first edible Easter bunnies made from sugar and pastry.  By the 19th century in America the Easter Hare became known as the Easter Bunny who brought baskets filled with eggs, chocolate, candy and other small gifts. 

Since the springtime festival coincided with the Christian belief of the resurrection of Jesus, the Easter Bunny eventually became an iconic symbol for our holiday. 

My 3 year old and I decided to make a simple bunny craft to decorate our table.  The materials we used for this fun craft were small terra cotta flowerpots, craft paint, craft glue, pom poms, foam sheets, chenille pipe cleaners, silly eyes, Easter grass and ribbon. 

We began by painting the flowerpots white for the bunnies.  While the paint was drying, I cut out ear shapes from the foam and then painted some pink in the middle ( Madailein decided her bunny would have all pink ears! )  We used the craft glue to stick the ears to the back of the flowerpots and the pom poms to form the face and tail.  Glue the silly eyes in 2 small pom poms; cut the pipe cleaners for whiskers and fill the pot with the Easter grass.  Final touch -  a ribbon around the middle and Voila!  you have a cute little Easter Bunny!

This was so simple to do with a toddler and only took us about 30 minutes from start to finish.  Madailein is so proud of her bunny since she was able to do a good portion of it by herself. 


Happy Hoppity Crafting! 

Tuesday, March 19, 2013

Easter Tulle Wreath

I love how the Valentine's Day tulle wreath turned out - so I decided to make an Easter version!  Who wouldn't smile at the happy colors and adorable bunny bow?!

Materials Needed:
* Styrofoam Circle Wreath
* Spool of pink tulle
* Spool of turquoise tulle
* Spool of sparkle yellow tulle
* Wired Easter ribbon
* Glitter curl picks (I found them at Pat Catan's)

I made this wreath just like the Valentine's wreath - cutting the tulle into approximately 6" lengths and knotting around the styrofoam.
Time-wise this took me around an hour; I must be getting quicker!! : D
The tulle was a little more expensive (I bought it at Hobby Lobby this time and did not have a coupon); so overall this wreath project cost me about $15.00.  Still not too bad!


Happy Crafting! The Shabby Nest

Saturday, March 2, 2013

Roar! Dinosaur Baby Blanket

It seems to be baby season around here!  So many people are expecting (not me!); I had to share this beyond adorable dinosaur blanket I made.

Since I don't have boys, I think I am living vicariously through these baby boy blankets.  They are so much fun to create and are turning out great!

JoAnn Fabrics had this really cute dinosaur / godzilla snuggle flannel.  I had no idea what I was going to make with it, but knew I had to get it!  From that flannel, the Roar! Dinosaur blanket was born.  :)


The front of the blanket is a yellow ribbed knit and I embroidered friendly dinosaurs in the corners!


Now I just need to find the perfect little guy to give this to!

Happy Crafting!